I must start by saying I am not responsible for any data loss that may occur as a result of this post. Please make a backup copy of everything within your Freenas volume before attempting to swap out a disk.
Running Freenas 9.10 within ESXi 6.0 is somewhat experimental and adds a bit of complexity when it comes to adding and swapping drives in a virtualized instance of Freenas. With that said, I have been running Freenas like this for 6 months without any issues. Using the method outlined in this post I have successfully swapped out six 500 GB hard drives for six 1.5 TB hard drives increasing my Freenas ZFS pool (zpool) size from 2TB to 6TB.
First, you must offline the disk you are planing to swap out. If this is not done your entire zpool will break. This will place your zpool in a degraded state, but that is okay as long as you move relatively quick to replace the drive. My zpool is configured as raidz2. This means a zpool can lose two hard drives before the entire pool is lost. This will work fine with raidz1, but in that configuration only one drive can be lost before losing the entire zpool.
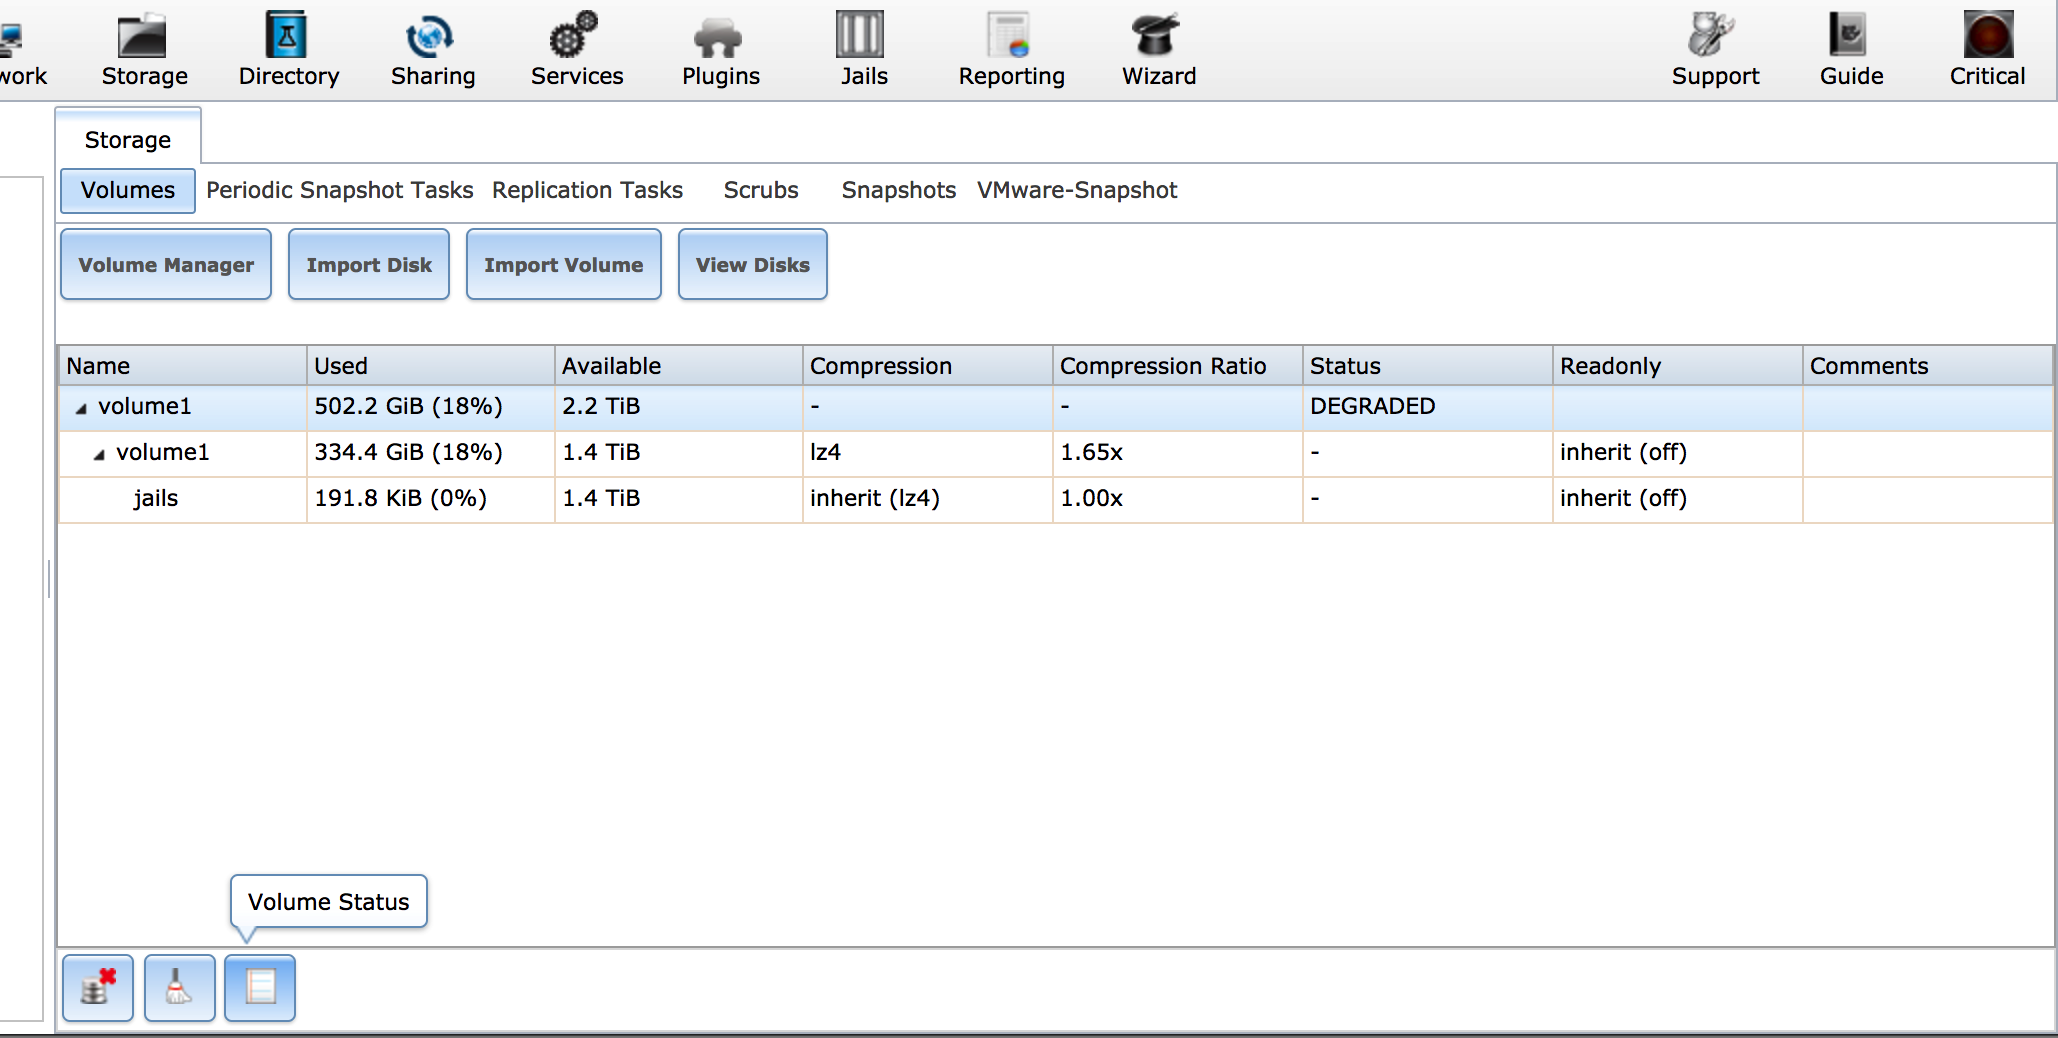
Placing a drive in an offline state can be done via the Freenas Web GUI by clicking on Storage->Volumes. Next, highlight the volume your wish to change and then click the “Volume Status” button (figure. 1).
Figure. 1
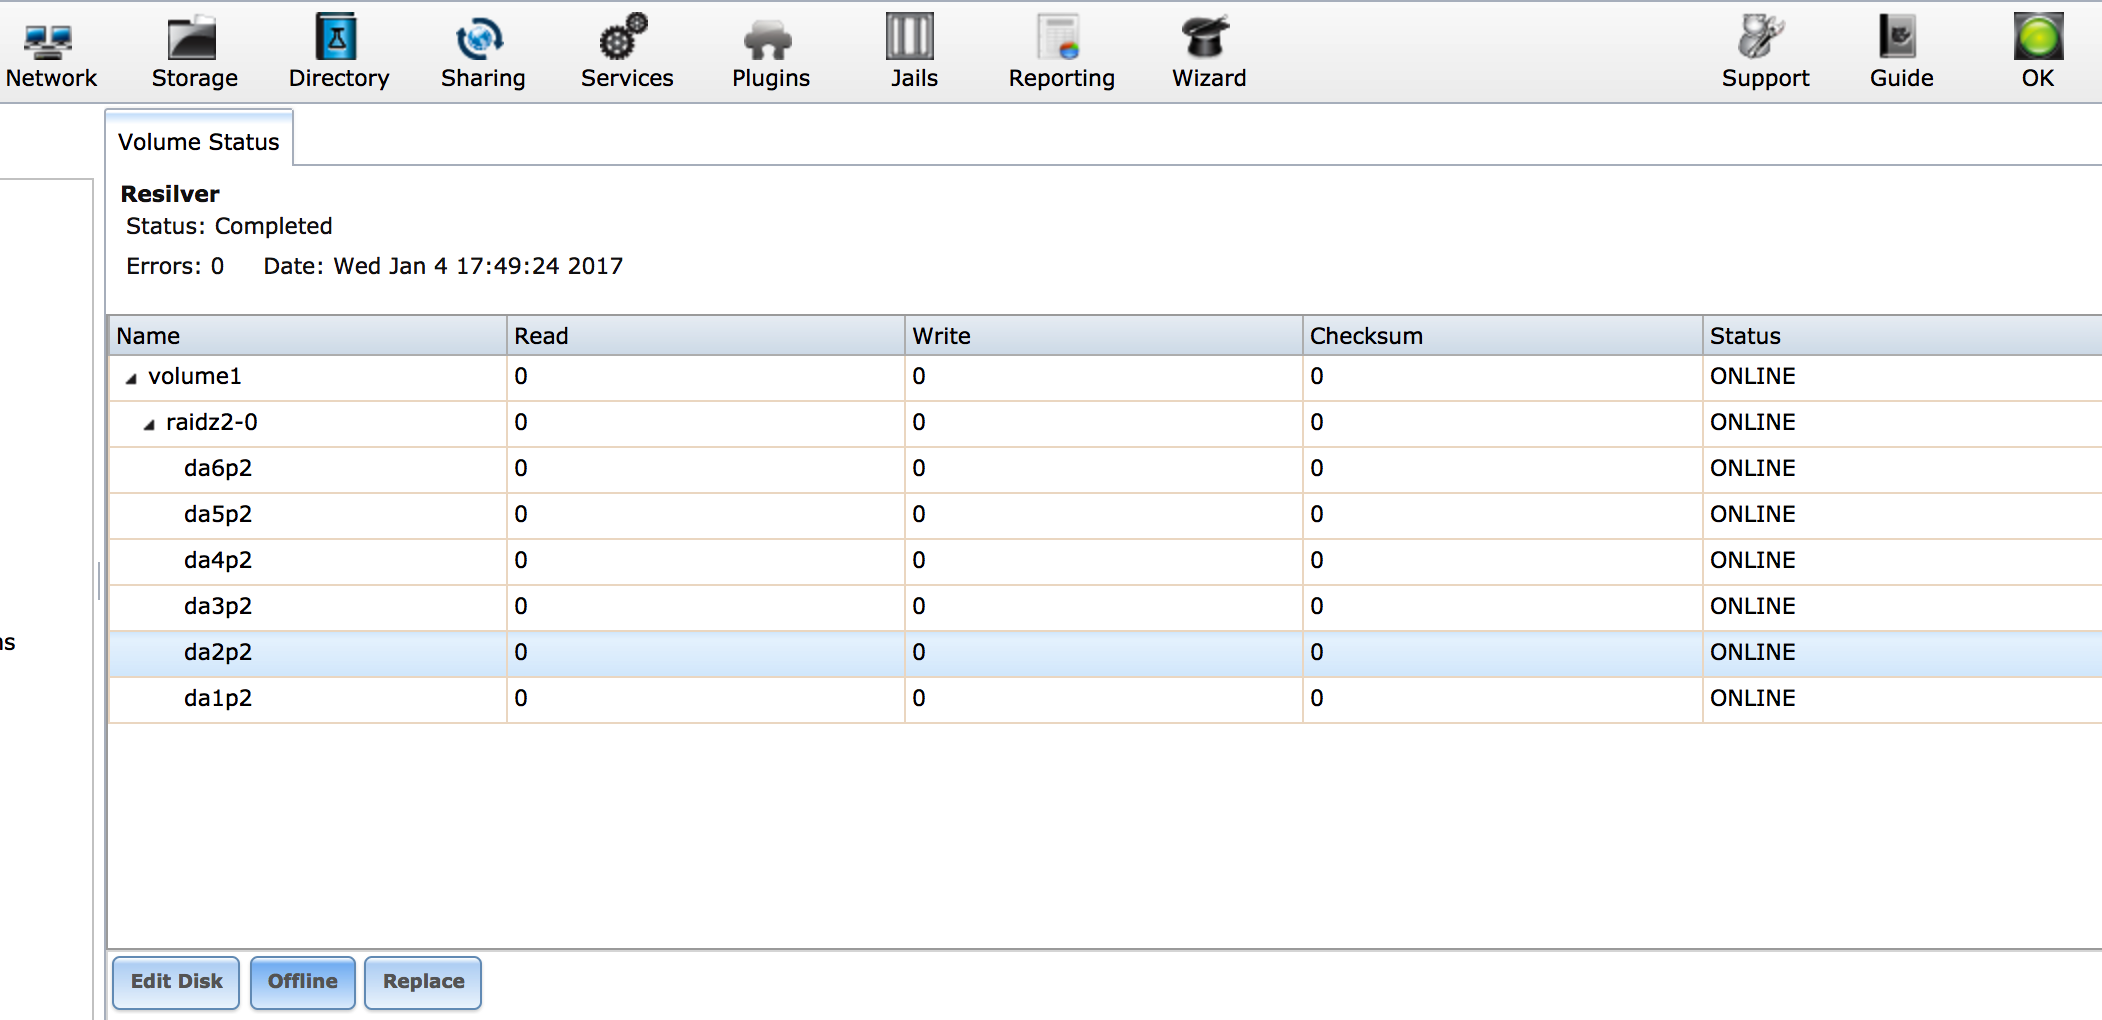
You should now see something similar to figure 2.
Figure. 2
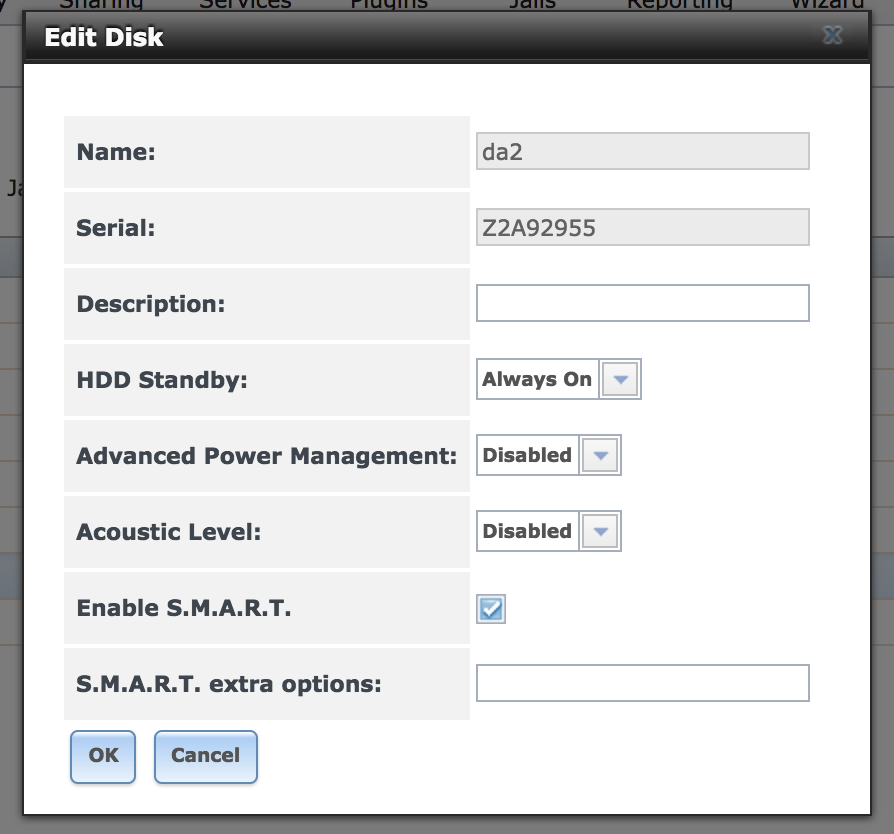
Before clicking the offline button be sure to write down the serial number of the hard drive being removed from Freenas so you know the correct physical disk to pull from the server. You can view the serial number by selecting edit disk as demonstrated in figure 3.
Figure. 3
Once the serial number has been recorded click OK and then click the offline button. Your zpool will now present as in a degraded state. Next, shutdown your Freenas VM, Power down ESXi, pull the physical hard drive from the server and replace it with a new one. When done power on ESXi, open a console and ssh into the ESXi server. It is now time to map the new physical drive to Freenas.
We need to change our working directory to ESXi’s “disks” directory and then list its contents as follows.
cd /dev/disks/
ls -la
You should see a list of physical hard drives connected to your ESXi server similar to figure 4.
Figure. 4
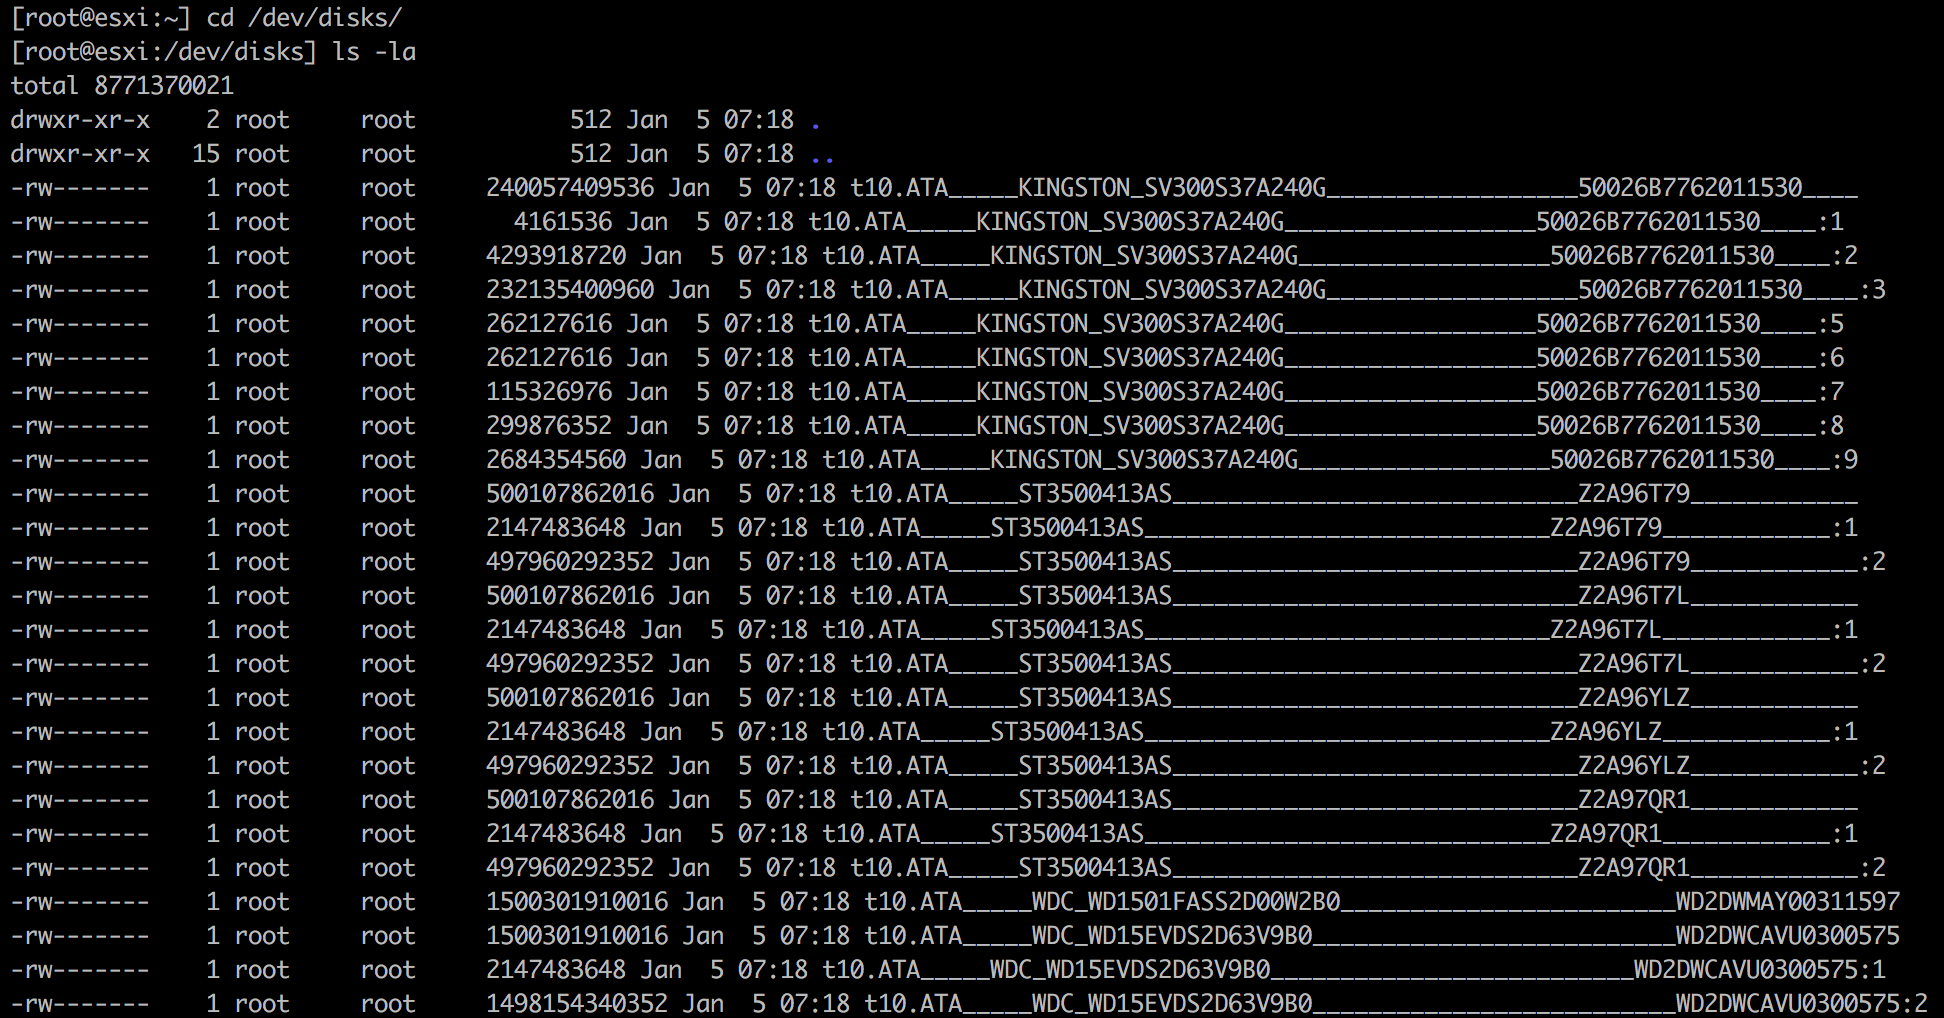
Look for the serial number of the hard drive recently added to the server and copy everything from t10.ata through the end of the line. Note: You may see multiple listing for the serial number of the new hard drive. Please copy the line that does not contain a colon with a number at the end (:1, :2, etc). See figure 5.
Figure. 5

Now change directory to where you keep RDM (Raw Device Mapping) links. I keep mine in a folder named RDM found on my main ESXi datastore. See command below.
cd /vmfs/volumes/datastore1/RDM/
We need to create a new RDM link that ESXi will use to mount your new physical hard drive. I like to name my RDM links after the serial number of the of the hard drive it corresponds to as it makes life easier when having to swap out a drive.
Lets first attempt to understand the command syntax so no mistakes are made. Below I have laid out the format for creating the RDM link. This is not an actual command to be cut and pasted into your terminal, but rather the format for creating your own unique RDM link.
vmkfstools -z /vmfs/devices/disks/"t10.ATA" /vmfs/volumes/datastore1/RDM/hd_serial_number + .vmdk
A complete break down of the format syntax above.
- vmkfstools -z – This is the command you must use to create the link.
- /vmfs/devices/disks/ – This location will be the same on all ESXi 6 instances. I have not checked other versions of ESXi, but it will probably be the same there too.
- “t.10.ATA” – This is what you copied above and corresponds to your new hard drive. See figure 5 for an example.
- /vmfs/volumes/datastore1/RDM/ – RDM link directory. Your location my differ from mine.
- hd_serial_number – This is the name of the link. You can call the link whatever you want, but you should stick with the serial number of the drive.
- .vmdk must be added to the end of the link.
Figure 6 is what the command looks like just before being run in practice.
Figure. 6

Confirm the existence of the new RDM link by running the following command.
ls -la /vmfs/volumes/datastore1/RDM/
Figure. 7
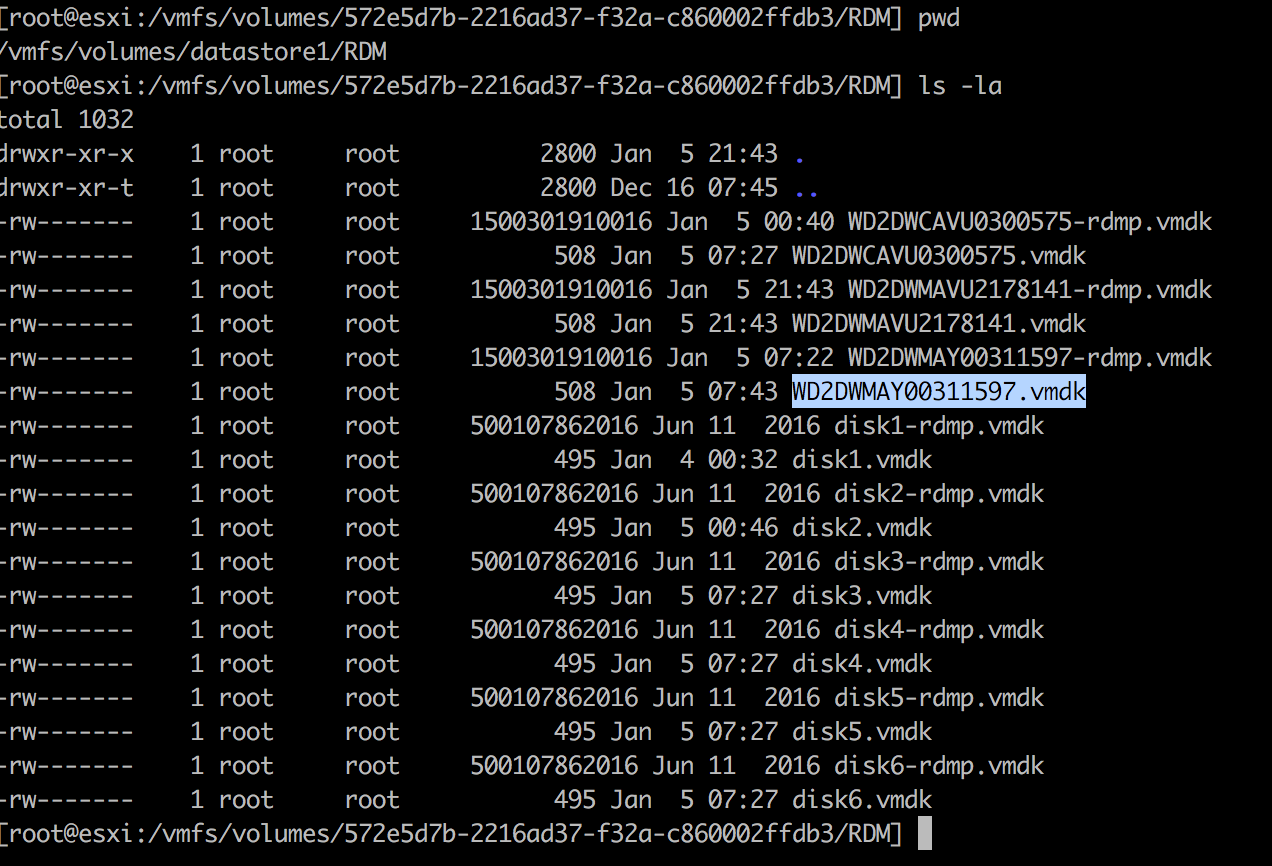
Upon successful completion of the new RDM link return to vSphere and edit setting on your Freenas VM. Remove the RDM link for your old hard drive. You will likely see two hard disk’s that have “Virtual Disk” in the summary. One is the disk running the Freenas OS and the other should be the old RDM link for the hard drive recently removed. Remove the the hard disk corresponding to your old drive paying extra close attention to not remove the disk that runs Freenas!
Note: The disk’s with a summary of Mapped Raw LUN are the other disks in the zpool.
Figure. 8
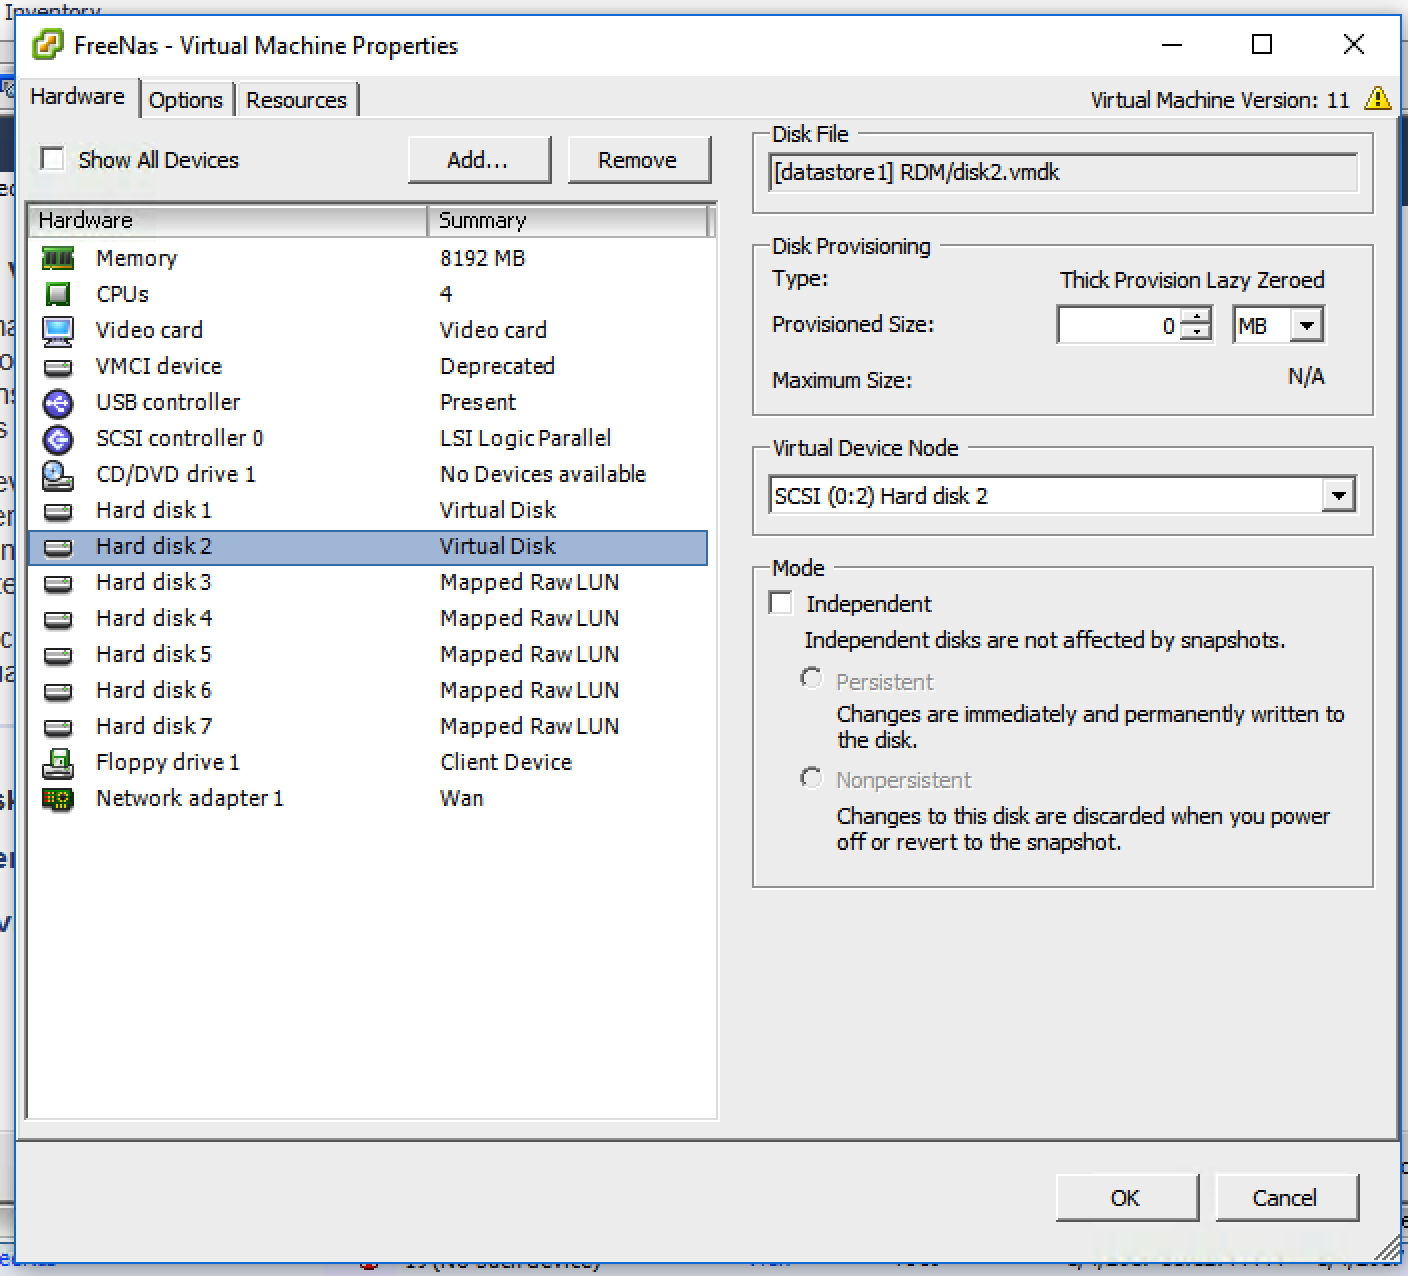
Note: Notice in the picture above under “Disk File” how the .vmdk file is named disk2.vmdk? This is now why I insist on naming the disk after the serial number as it makes mistakes less likely to occur during a swap. When I first set this system up I named my RDM links as disk1 – disk6. Not useful!
Now it’s time to add the new Disk to the Freenas VM
Figure. 9
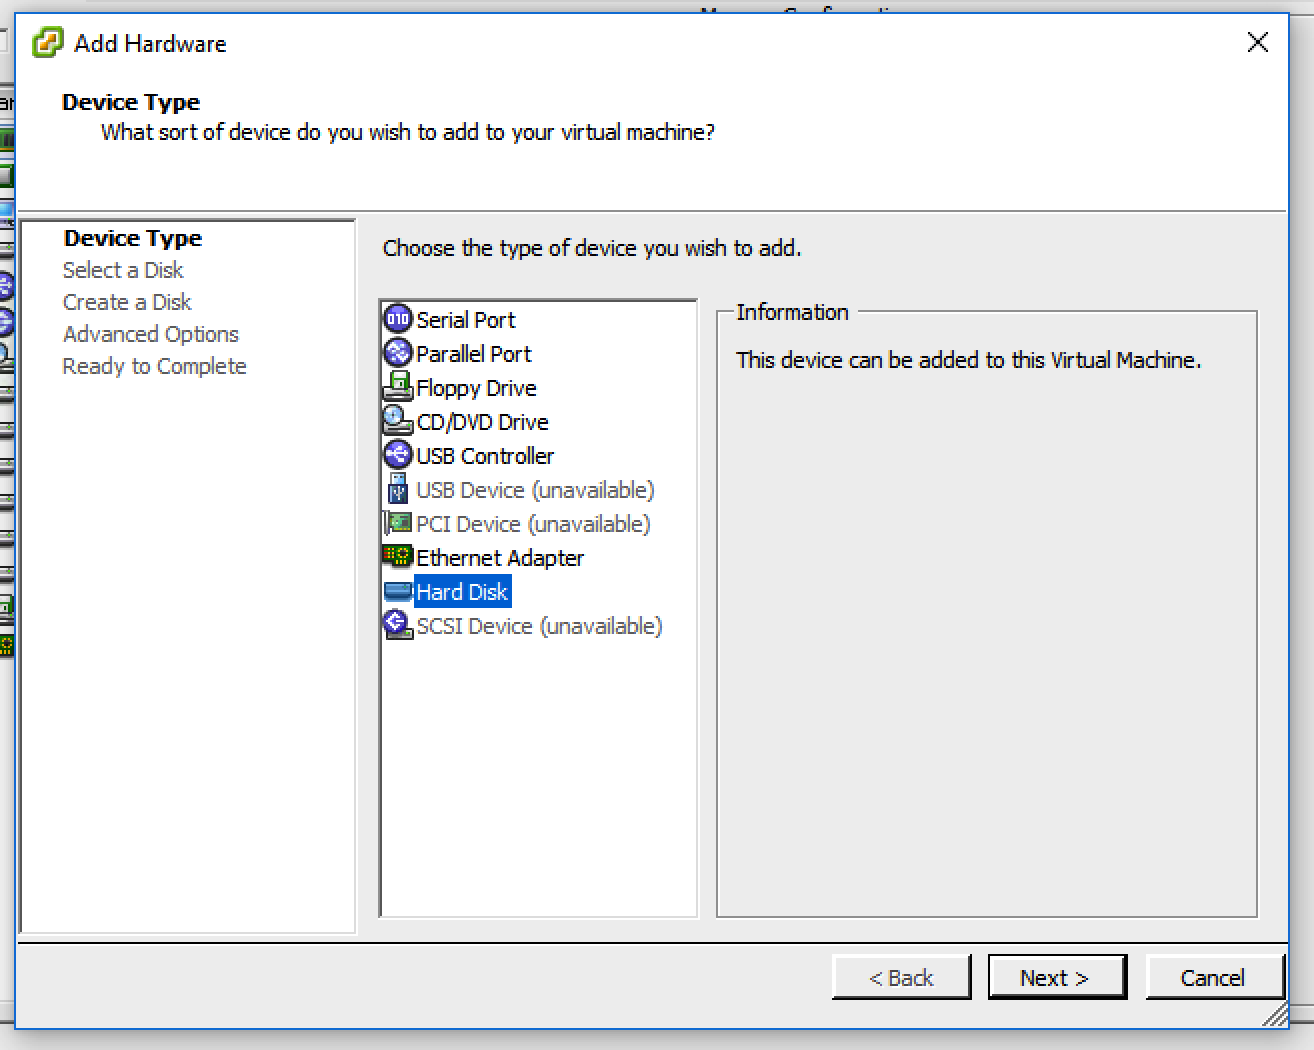
Select “Use an existing virtual disk”.
Figure. 10
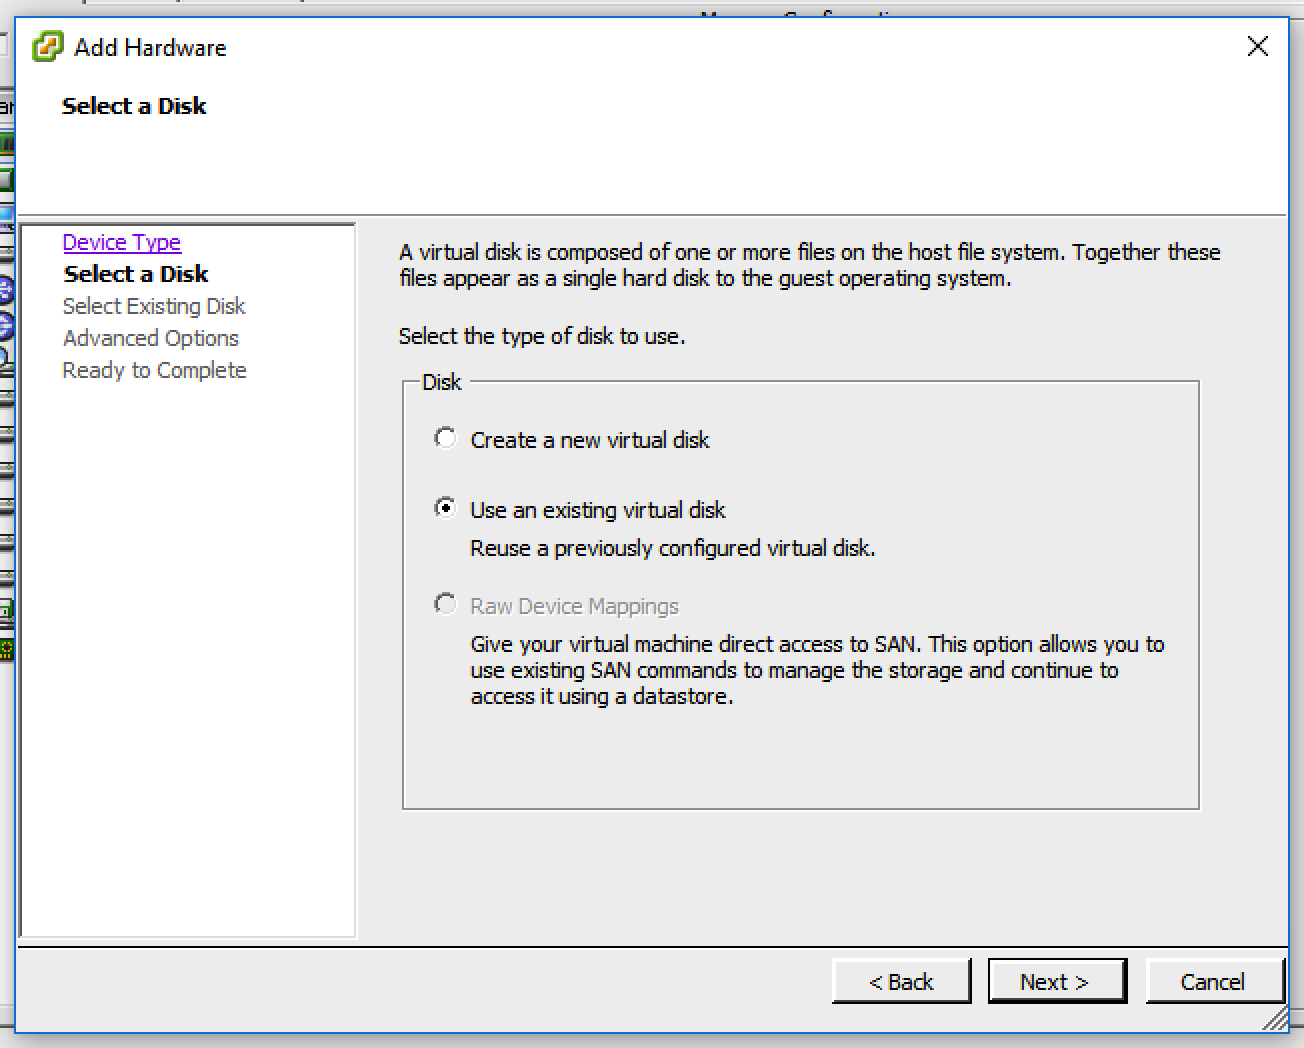
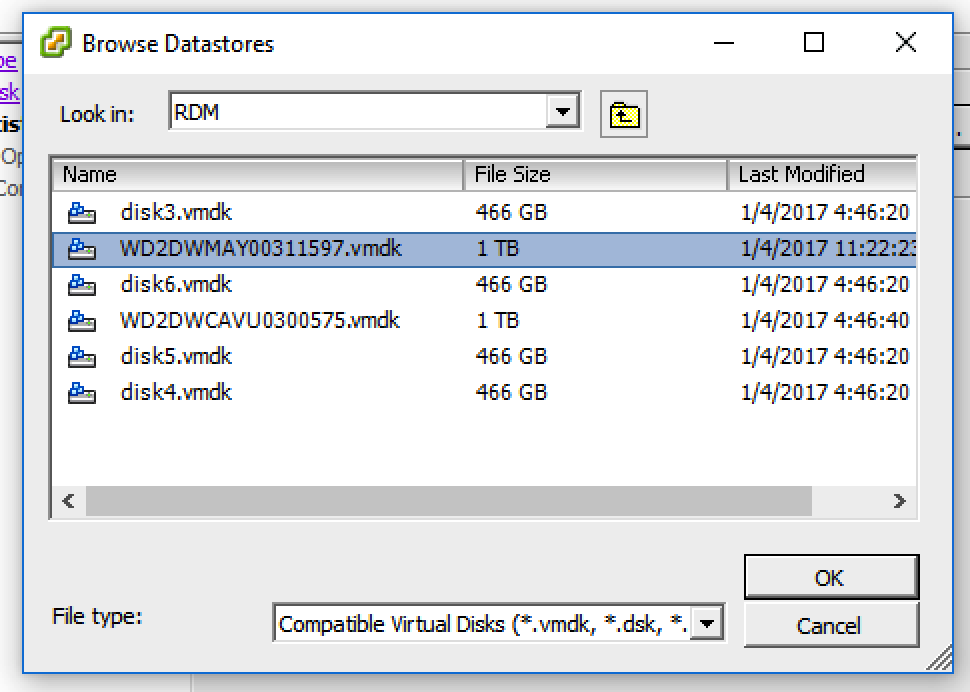
Browse to /datastore1/RDM and select the .vmdk file corresponding to the new hard drive.
Figure. 11
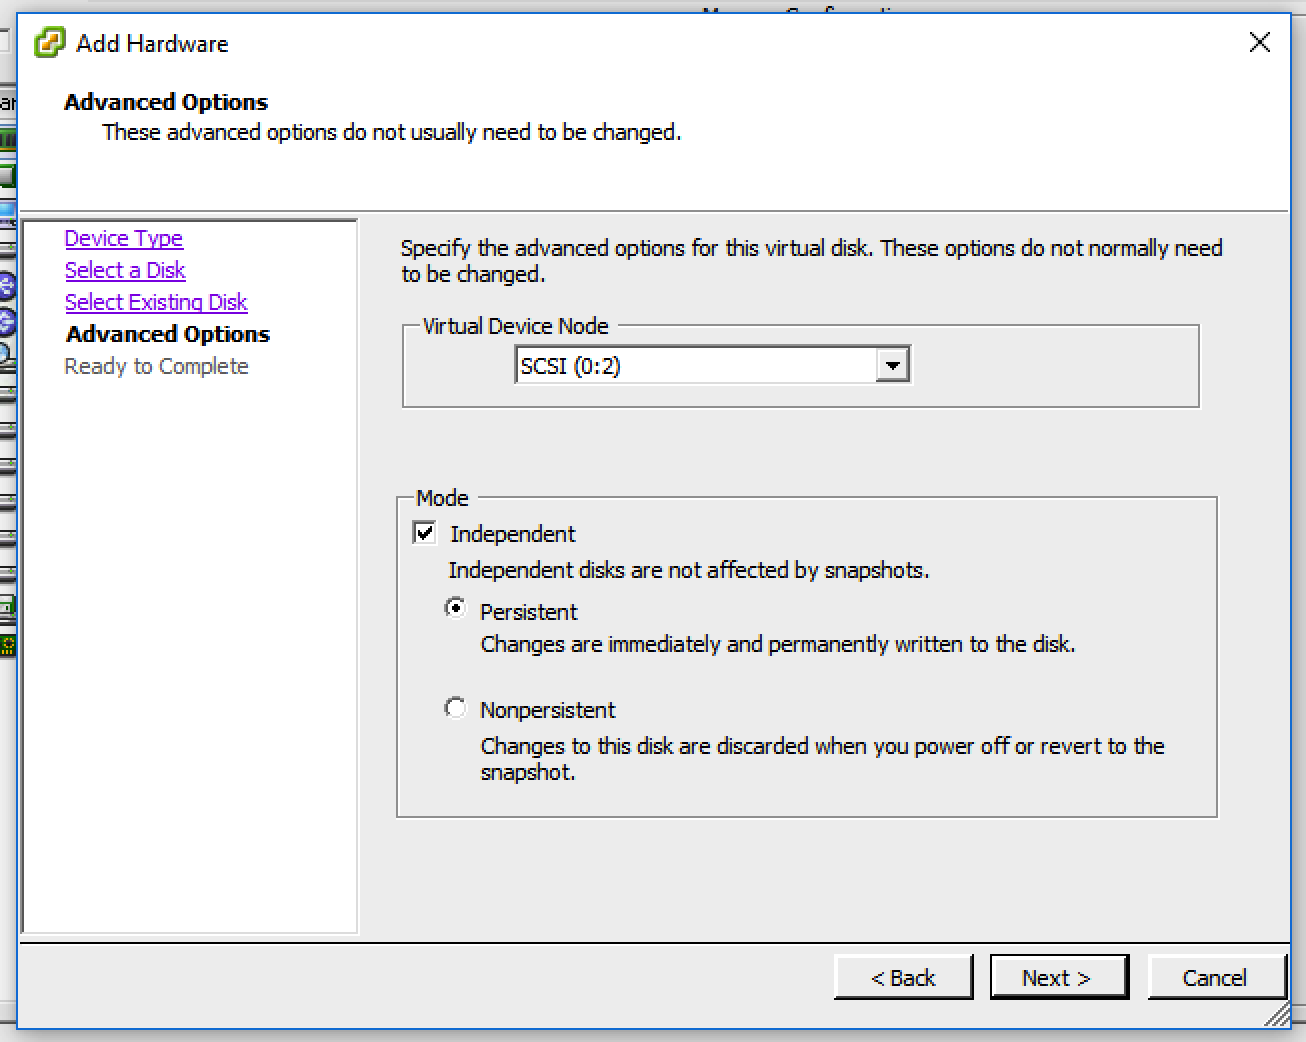
Select “Independent” and “Persistent” and click next.
Figure. 12
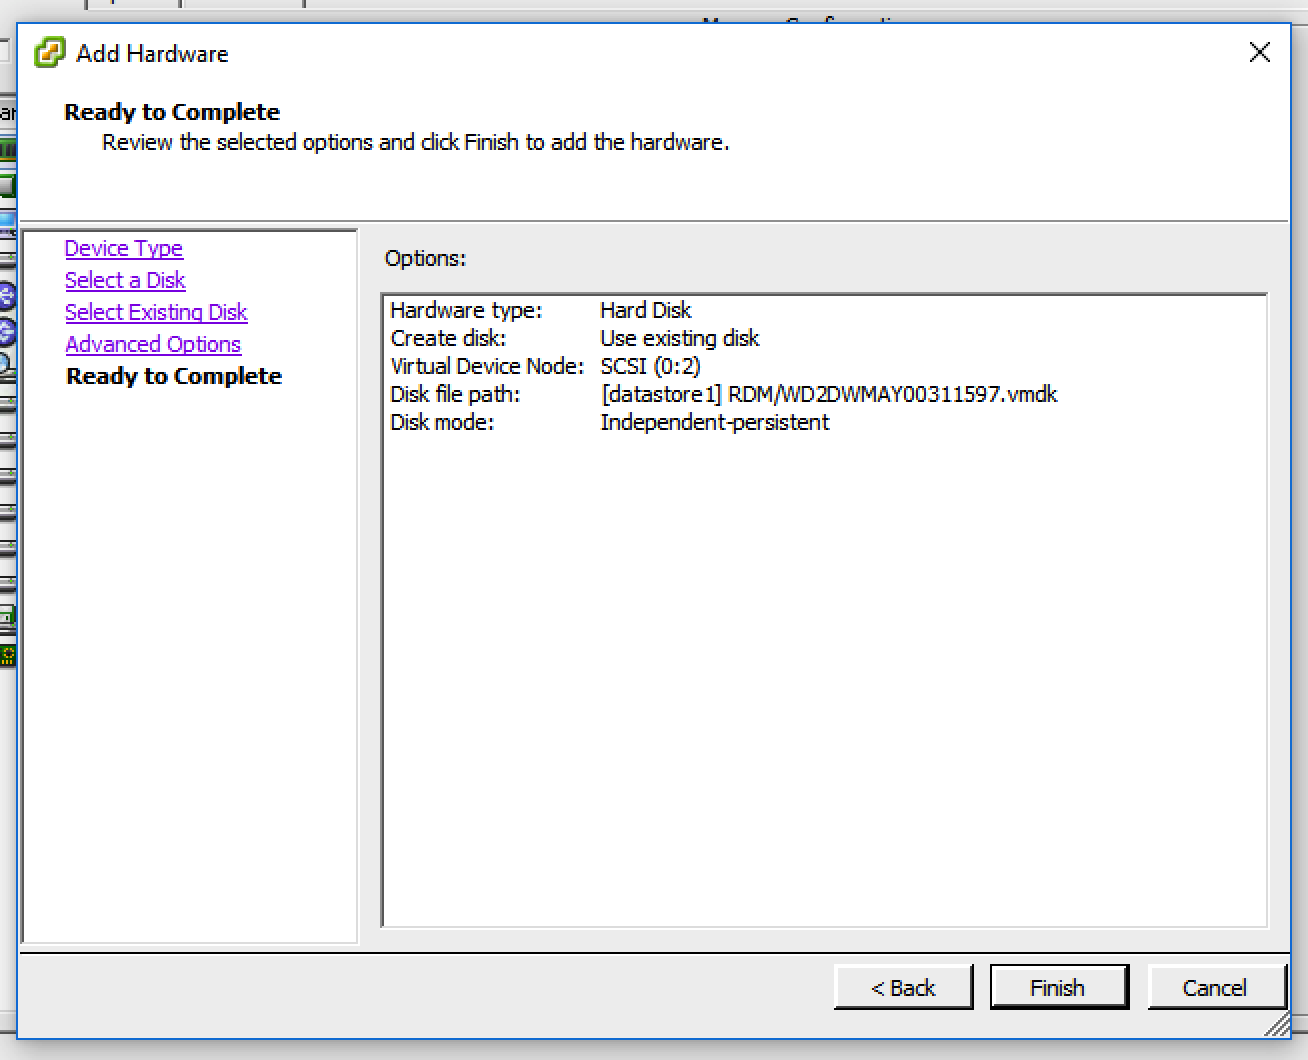
Click “Finish” to complete the process of adding the new drive to the Freenas VM.
Figure. 13
Now power on the Freenas VM within vSphere and log into the Freenas Web GUI to complete the final step of resilvering your zpool.
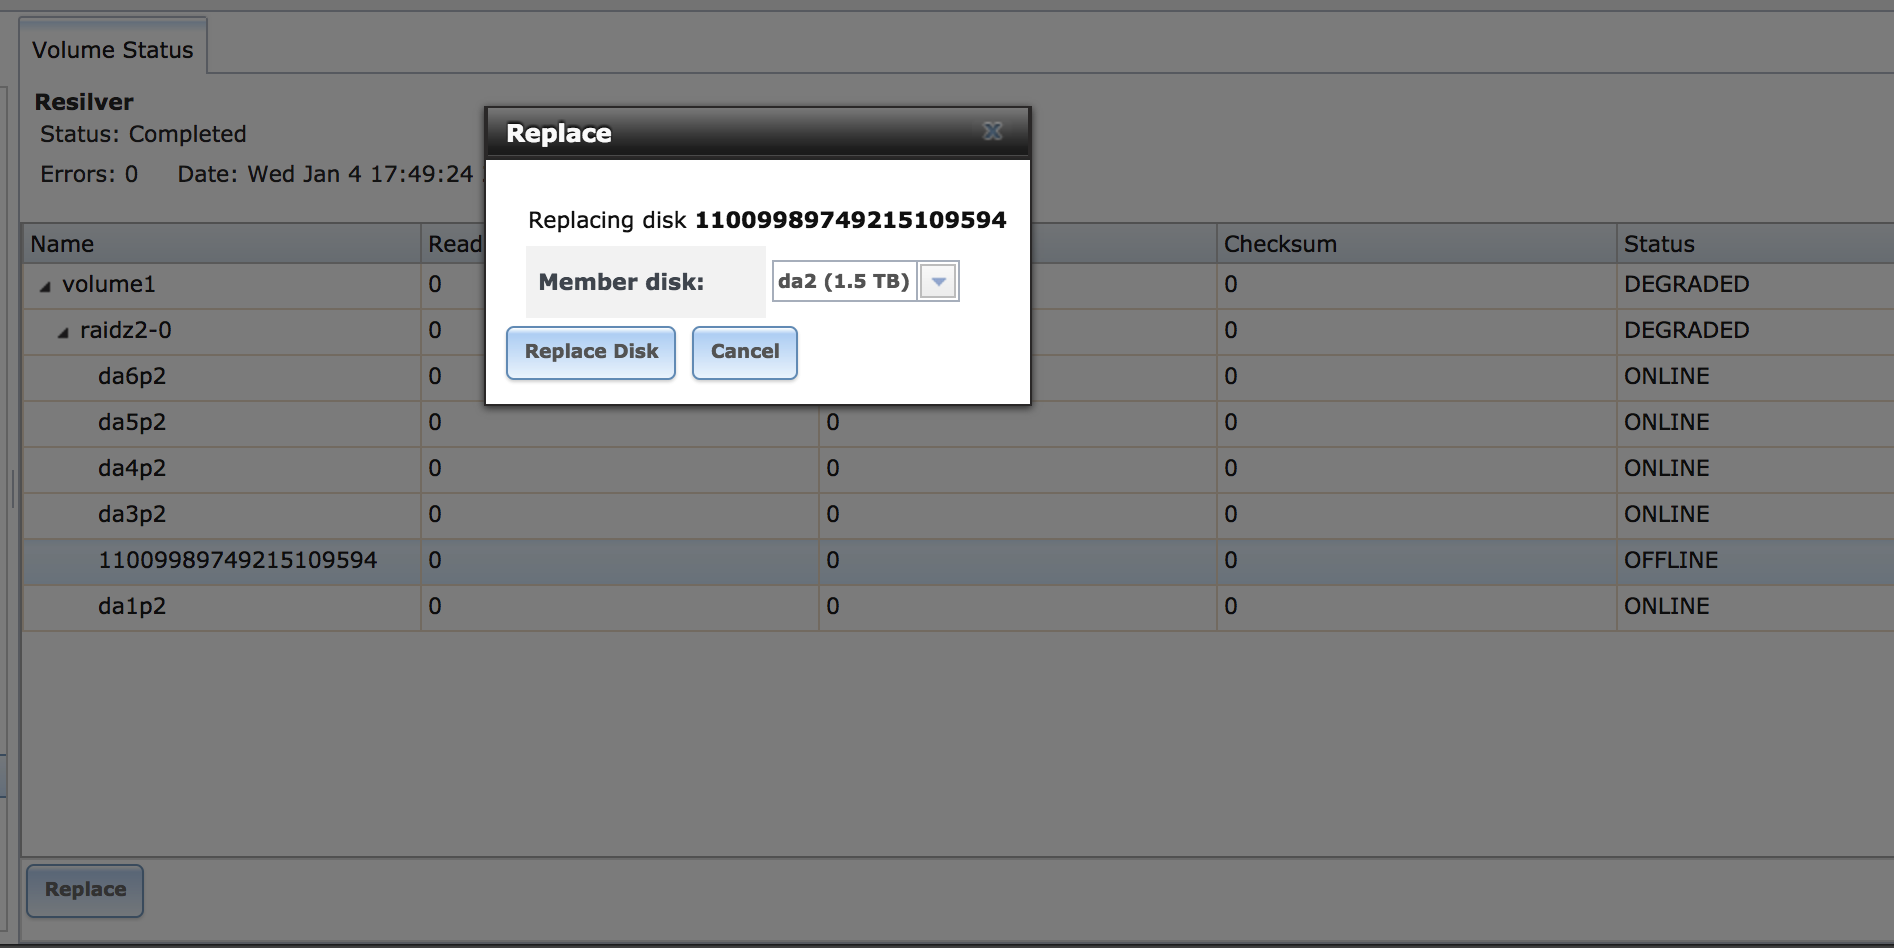
Return to Storage->Volumes. Highlight the volume you wish to change and then click the “Volume Status” button (figure 1). Select the disk with the status “OFFLINE” and click the Replace Disk button. You should see the new disk under Member disk. Click Replace Disk to start the resilvering process.
Figure. 14
That’s it! It should take about 1 to 3 hours to rebuild your zpool with the resilvering process depending on the size of the zpool. For me it took about 1 hour for the resilving process to complete on a per disk basis. I know it seems like a huge process, but it really is not once you do it a couple of times. My average swap time including the resilvering process start to finish was about 1 hour and 30 minutes.